Home

 Creators
 Search
 Recent
 Random
 Posts
 DMs
 Tags
 Random
 Importer
 Import
 FAQ
 Account
 Register
 Login
 Favorites
 Keys
 Logout
 Telegram

Teddy bear restoration WIP2 and result! (Patreon)
Content
ENGLISH/ESPAÑOL
Hello everybunny!Today wue have the new and last WIP of the teddy bear restoration. We already finished it, and we hope that you like the process and result of this incredible project!
Going back to the previous post, after washing and leaving it dry, we realised that the plush would need more washes, because the fabric was extremely dirty. But we couldn't rub the dirt out with all the ripped seams and he plush barely holding together. So we rinsed it one more time and then we mended all the seams before the third bath.
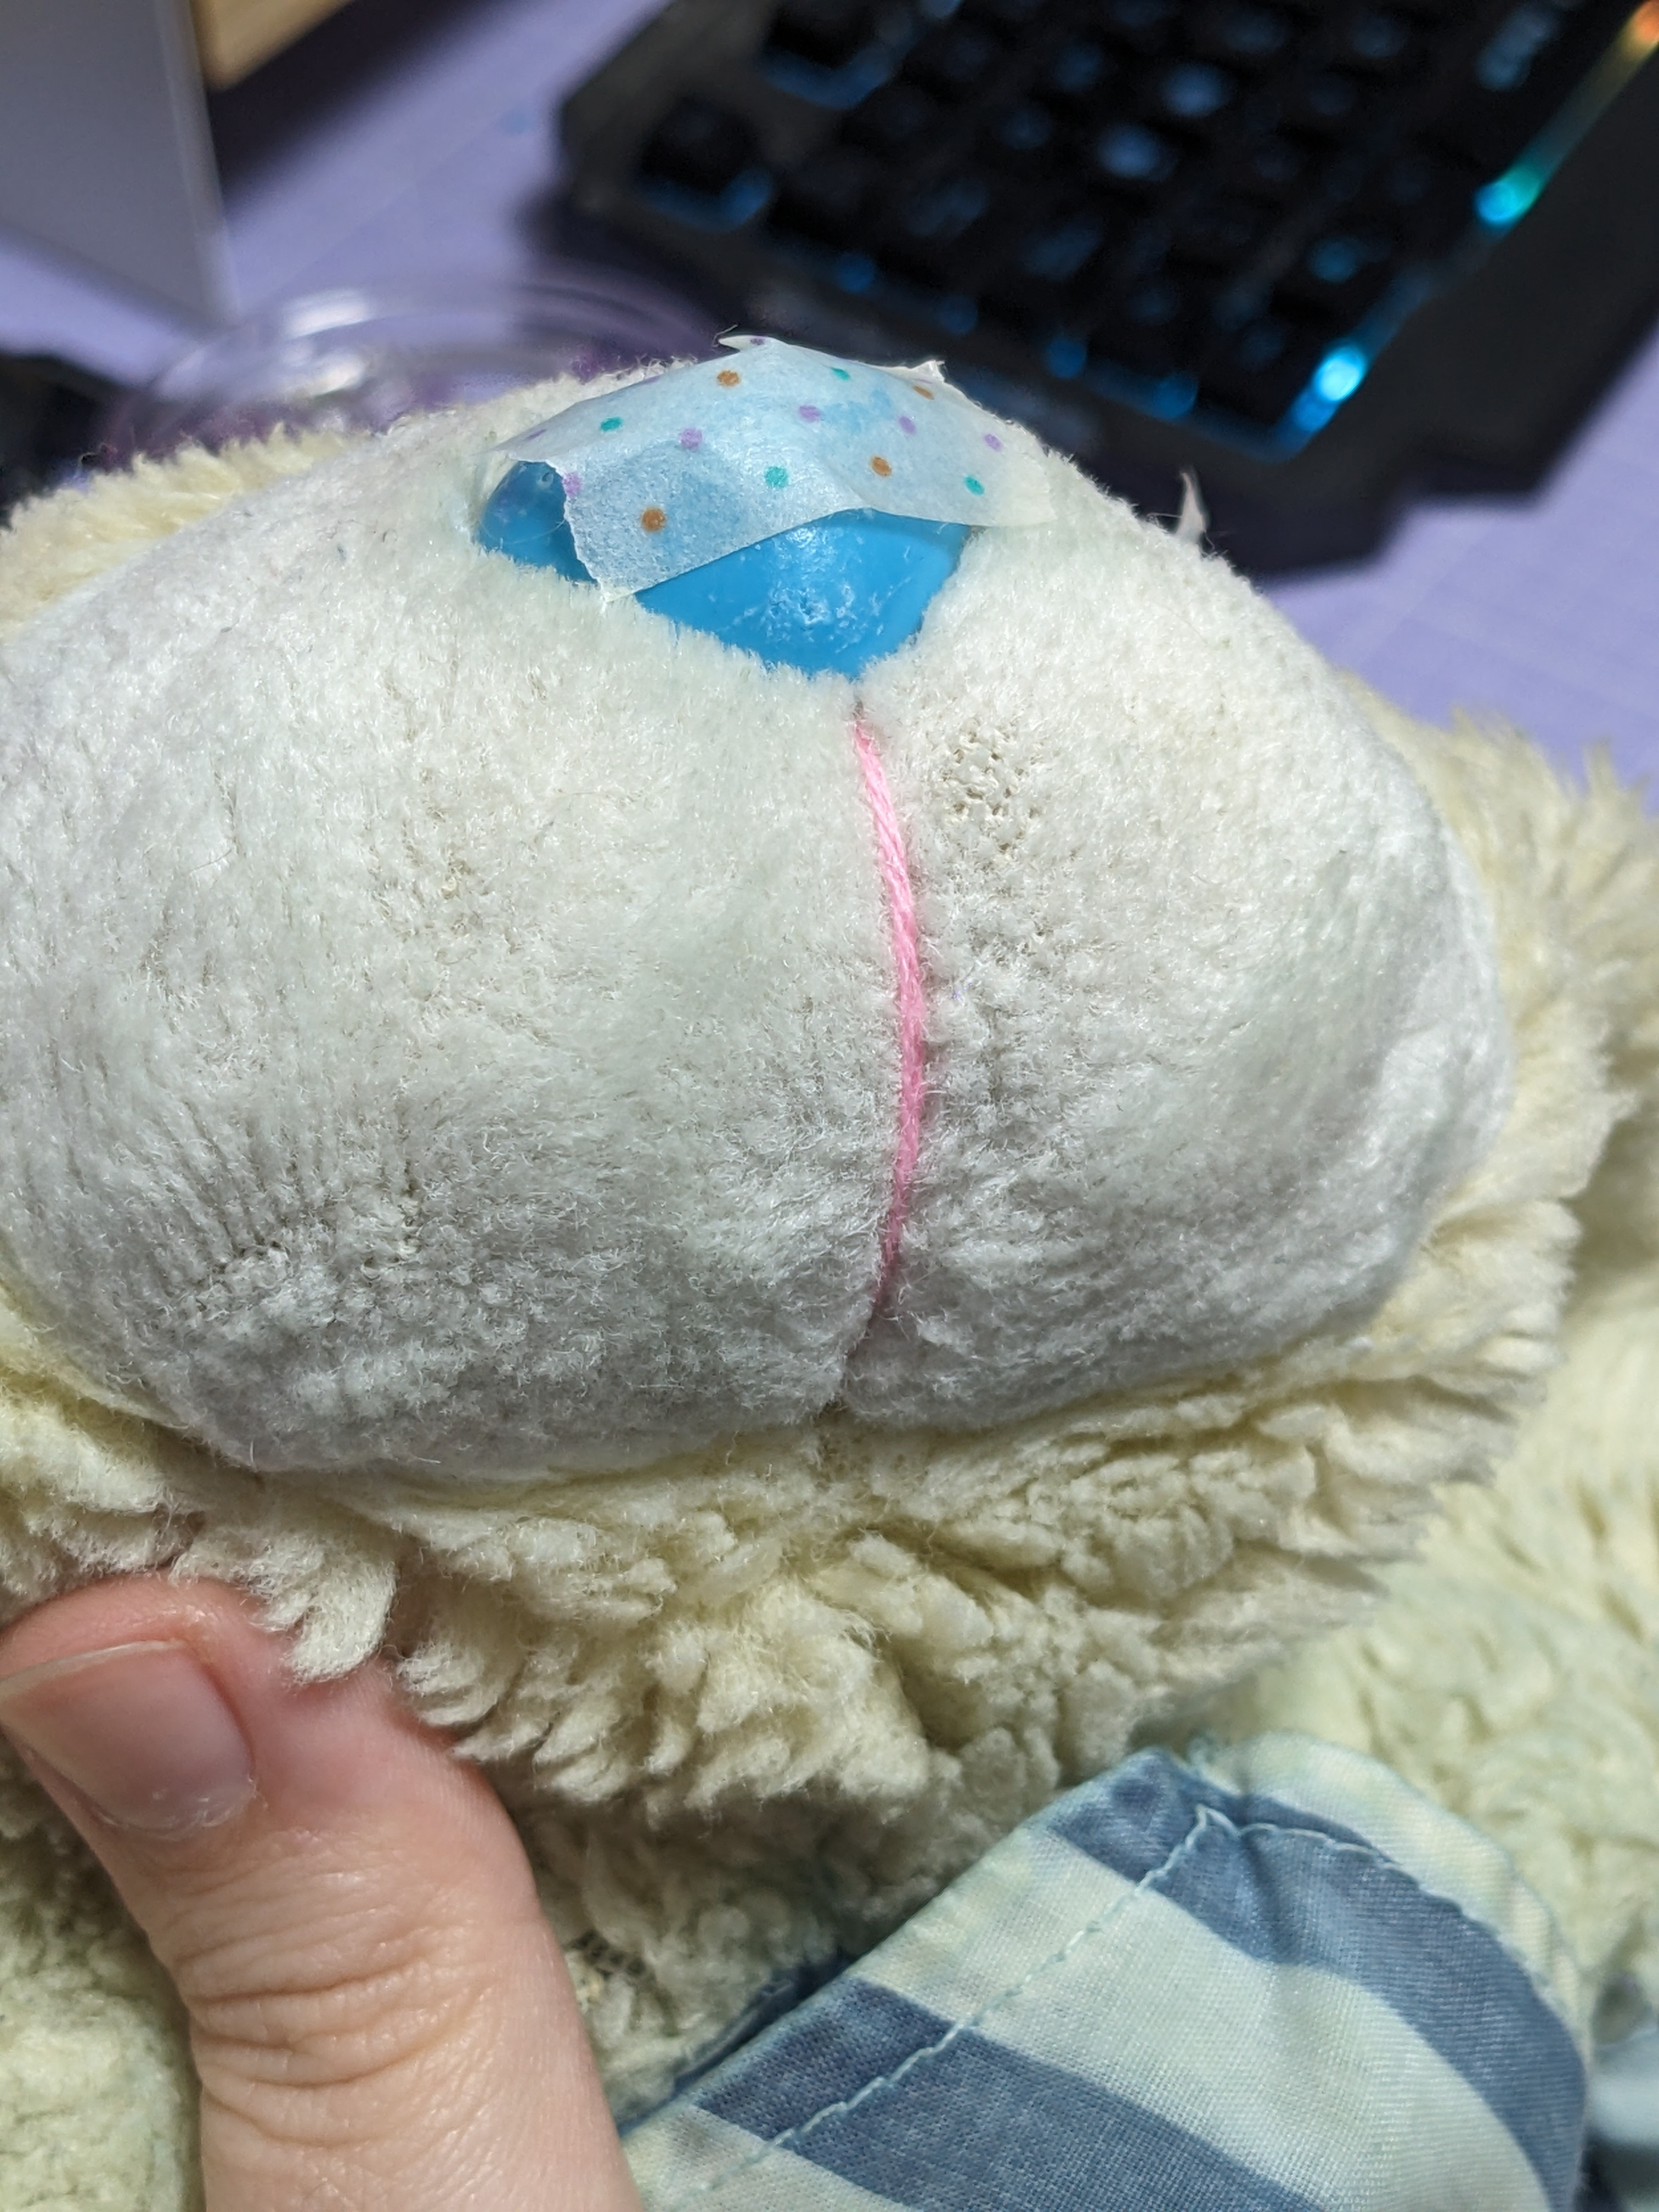
For the repair, we had to work on 3 things. The first, was sew the seams ripped by time.Then, there were parts mended by the owner, but they were messy or already worn out. So we carefully ripped all those stitches and did the same as the first step. The problem was that since they had used a thick thread and needle, there were holes in the fabric, so in some parts we had to sew a couple milimiters inside the pattern to use "healthy" fabric so the seam was more resistant. You can see photos of the before and after. Even us are surprised by the difference!!Finally, we fixed the muzzle thread. It was too short to make a knot, so we kept it in place with hot glue in the inside.
With all the seams mended, we could give it a last wash, rubbing out all the remaining dirt in every piece of the plush. And this time it turned out super clean!
At this point the plush was fixed. But we still had the problem we talked about. The body fabric is weak, and with the tenson of new stuffing it could rip again.So here started the second phase of this restoration; the reinforcment.Our idea was to make him a face body, that would go inside the plush, and it would be the one we would stuff. This way the original fabric would be over it, with no tension, only working as clothes.
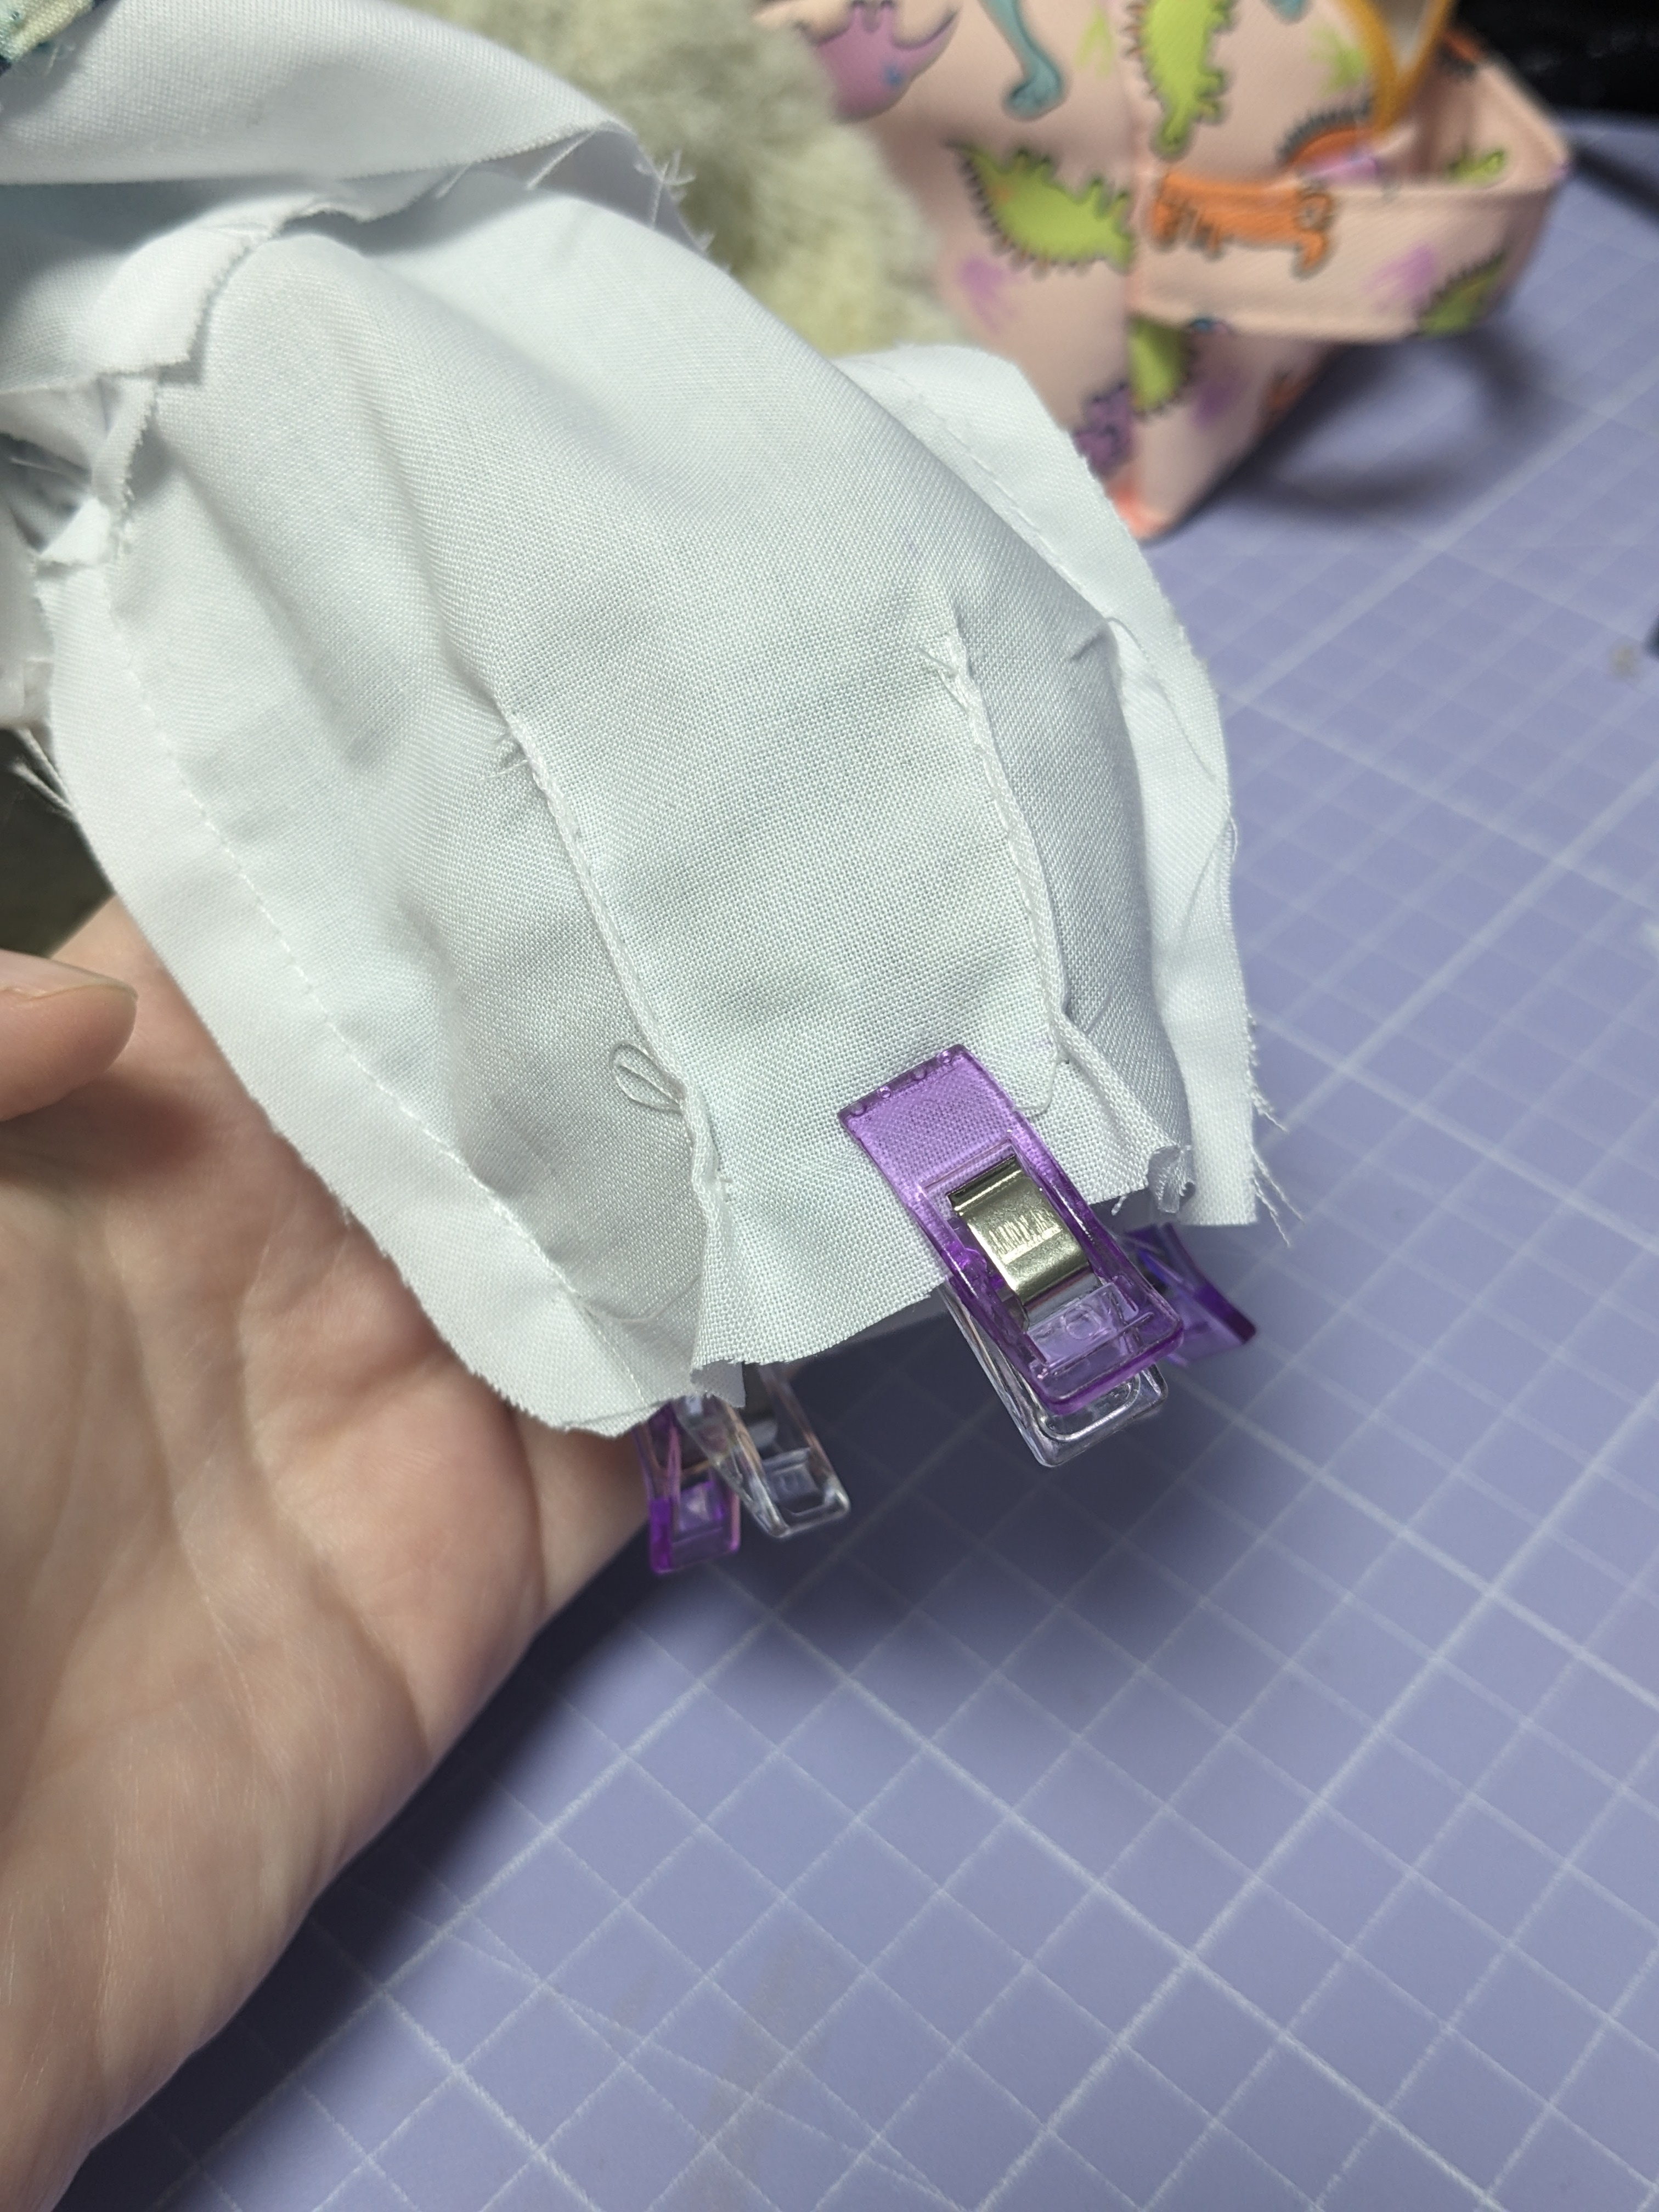
For that, we used the tape method to get a base pattern. With a couple quick tests, we got a good body pattern! With the fake body done, we sewed it to the faux fur piece's seam allowance to keep it in place. And with this fake body sewn, the plush was completely reinforced!
There was only the last step left, the aesthetic part. In one side, we sewn the vest together, which had ben unsewn for years.On the other side, we wanted to fix the faux fur. Despite having washed it and it not having hard dirt stains, it was still very matted due to its old age. So with a dog brush and A LOT of patience, we brushed aaaaaall the fur parts.In the pictures you can see the hughe difference between the rbushed and matted parts. It's amazing, they look like completely different fabrics!Of course the texture isn't perfect, but keeping in mind that this plush is over 30 years old, we managed to get a lot of the original fluffiness back ^^ And it's pleasant to touch.
With this, we can show you the restored plush!Even us can't believe it's the same plush of the first photos. Specially in the face fur and the armhole seams. It looks like a new plush!!
We took the right decisions without doubt. Like the experiment with the fake inner body. It was an idea we had never used, and we were afraid that it wouldn't look good or it turned out too stiff when hugging it. There were a few wrinkles in the legs that we would have liked to remove.But at the end we had lots of limitations. And we think that we gave it all the love and we managed to make the best work we could offer ^^
What do you think of the result? Do you think we gave it a good second like to this little guy? We're personally very excited to be able to make something like this! We enjoyed this process so much that we would love to learn more about plush restoration and make more of them in the future.
Also, we have thought that we can make a class about plush care and restoration in the future. what do you think?
We''d love to know your opinion about this adventure!
----ESPAÑOL----
Hello everybunny!Hoy os traemos un nuevo y último WIP de la restauración del osito de peluche. Y es que ya lo hemos terminado, y esperamos que os guste el proceso y resultado de este increíble proyecto!
Volviendo al post anterior, después de bañarlo y dejarlo secar, nos dimos cuenta que el peluche iba a necesitar más lavadas, porque la tela estaba muy sucia. Pero no podíamos frotar bien con las costuras rotas y el peluche casi desmontado. Así que le dimos un aclarado más y luego nos pusimos a repararlo antes del tercer baño.
Para repararlo, tuvimos que trabajar en 3 puntos. El primero, coser las costuras rotas por el tiempo. Después, habían zonas que estaban remendadas a mano por su dueña, pero que habían quedado mal o ya estaban muy estropeadas. Así que con cautela descosimos todas esas zonas e hicimos lo mismo que en el primer punto. El problema era que al haber usado un hilo y aguja gruesos, habían quedado agujeros, por lo que en algunas zonas tuvimos que coser un par de milímetros por debajo de la costura para usar tela "sana" y la costura sería más fuerte. Podéis ver las fotos del antes y después. Hasta a nosotras nos sorprende!!Por último, arreglamos el hilo de la boca que estaba suelto. Como era muy corto para hacer el nudo de nuevo, le dimos un poco de silicona por dentro para fijarlo.
Arregladas todas las costuras, pudimos darle el último lavado y frotar con cuidado, pero intensamente, todas las zonas una por una. Y esta vez quedó súper limpio!
En este punto teníamos el peluche "arreglado". Pero seguíamos con el problema que os comentamos. La tela del cuerpo estaba muy débil, y con la tensión del relleno podía romperse o desgarrarse de nuevo.Así que aquí empezó la segunda fase de la restauración; el refuerzo.Nuestra idea era hacerle un cuerpo falso, que iría por dentro de la tela del cuerpo. Y ese cuerpo sería el que se rellenaría. Así la tela original quedaría por encima y sin tensión, solo haría la función de ropa.
Para ello, hicimos el método de la cinta para sacar una base del patrón. Y haciendo un par de pruebas rápidas, sacamos un patrón de cuerpo bastante bueno! Hecho el cuerpo, tuvimos que coserlo al margen de costura de las piezas peludas, para que sustituya el original. Con esta pieza falsa cosida, el peluche ya quedaba completamente reforzado!
Solo quedaba la tercera fase, los arreglos estéticos finales. Por un lado, le cosimos el cierre del chalequito de nuevo, que estaba descosido de hacía años.Y por otro, queríamos arreglar la tela peluda. Aunque la habíamos lavado y ya no tenía costras de suciedad, seguía muy apelmazada y dura por los años. Asi que con un cepillo para perros y MUCHA paciencia, empezamos a peinar toooodas las piezas peludas. Podéis ver en las fotos la gran diferencia en las zonas sin peinar y las peinadas. Es increíble, parecen telas distintas! Sí que es verdad que la textura no queda 100% perfecta, pero teniendo en cuenta que tiene 30 años, hemos podido recuperar mucho su tacto original ^^ y es muy agradable de acariciar.
Y ya con todo hecho, podemos presentaros el peluche restaurado!De verdad que hasta nosotras nos cuesta creer que sea el mismo peluche de las primeras fotos. Sobretodo en el pelo de la cabeza y las costuras de los hombros. Es que parece un peluche nuevo!!
Sin duda las decisiones que tomamos fueron las correctas. Como el experimento del cuerpo falso. Era una idea que jamás habíamos usado, y nos daba miedo que no quedase bien o quedase demasiado tieso al abrazar. Le quedaron algunas arrugas en las piernas por ejemplo, que nos hubiera gustado eliminar.Pero al final teníamos muchas limitaciones. Y creemos que le hemos dado todo el cariño y hemos logrado el mejor trabajo que podíamos ofrecer ^^
Qué os parece a vosotres el resultado? Creéis que le hemos dado una buena segunda vida a este pequeñín? La verdad es que nosotras estamos super ilusionadas con haber logrado algo así!Nos ha gustado tanto este proyecto que nos gustaría aprender y hacer más del estilo en el futuro.
Además, hemos pensado podríamos hacer alguna clase pronto sobre cuidado y restauración de peluches aprovechando lo que hemos aprendido con este último. Qué os parece la idea?
Os agradecemos que comentéis vuestra opinión de toda esta aventura!
Files