Home

 Creators
 Search
 Recent
 Random
 Posts
 DMs
 Tags
 Random
 Importer
 Import
 FAQ
 Account
 Register
 Login
 Favorites
 Keys
 Logout
 Telegram

Apple WIPs (Patreon)
Content
ENGLISH/ESPAÑOL
As promised, today we will show you all the creation process of our adorable Applins! Since they don't have many parts, we'll talk about everything in this post. Let's go~
When we had the idea to make this Pokémon we had one thing clear. We wanted the apple to look like a real apple. We wanted it to be realistic with its curves and shapes. We also wanted to make those holes at the top and bottom like all apples (and Applin's model has, too). So we started to think over and over how we would make that. What we first did was make a 6 piece sphere instead of a 4 piece one, because Applin's motive repeats 6 times so it would be the easiest way to make it. After that, we started to modify the pattern to get the apple shape, but we couldn't make it with just the patterns.
And at one point, Cris suggested to use the thread sculpting technique. We haven't used it many times, just for some plush paws and for the big Drifloon's cloud. But we knew that other plush makers use it for other details and to help get better shapes. So we started trying it out. As you can see in the pictures, it wasn't easy to get the shape we wanted hahaha. We always say that the simpliest shapes give us the most headaches sometimes, because they have such few details that you need to make them perfect in order for them to look good. We also needed more tests because it not only depended on the pattern, but also on how we sculpted it. Depending on how we sculpted it the apple turned out too long or too short and wide, it was difficult to get that "heart" shape.
But after a few days of trial and error, we finally got the shape we wanted. And it's honestly the part of the plush we're most proud of :)
Once we had the shape, we worked on the apple's colour changes. At first we wanted to sew them with the sewing machine, but they were too small for that so we decided to make them with an embroidery applique. It would also be easier for our patrons to sew it this way ^^. Luckily, this part was quick to make!
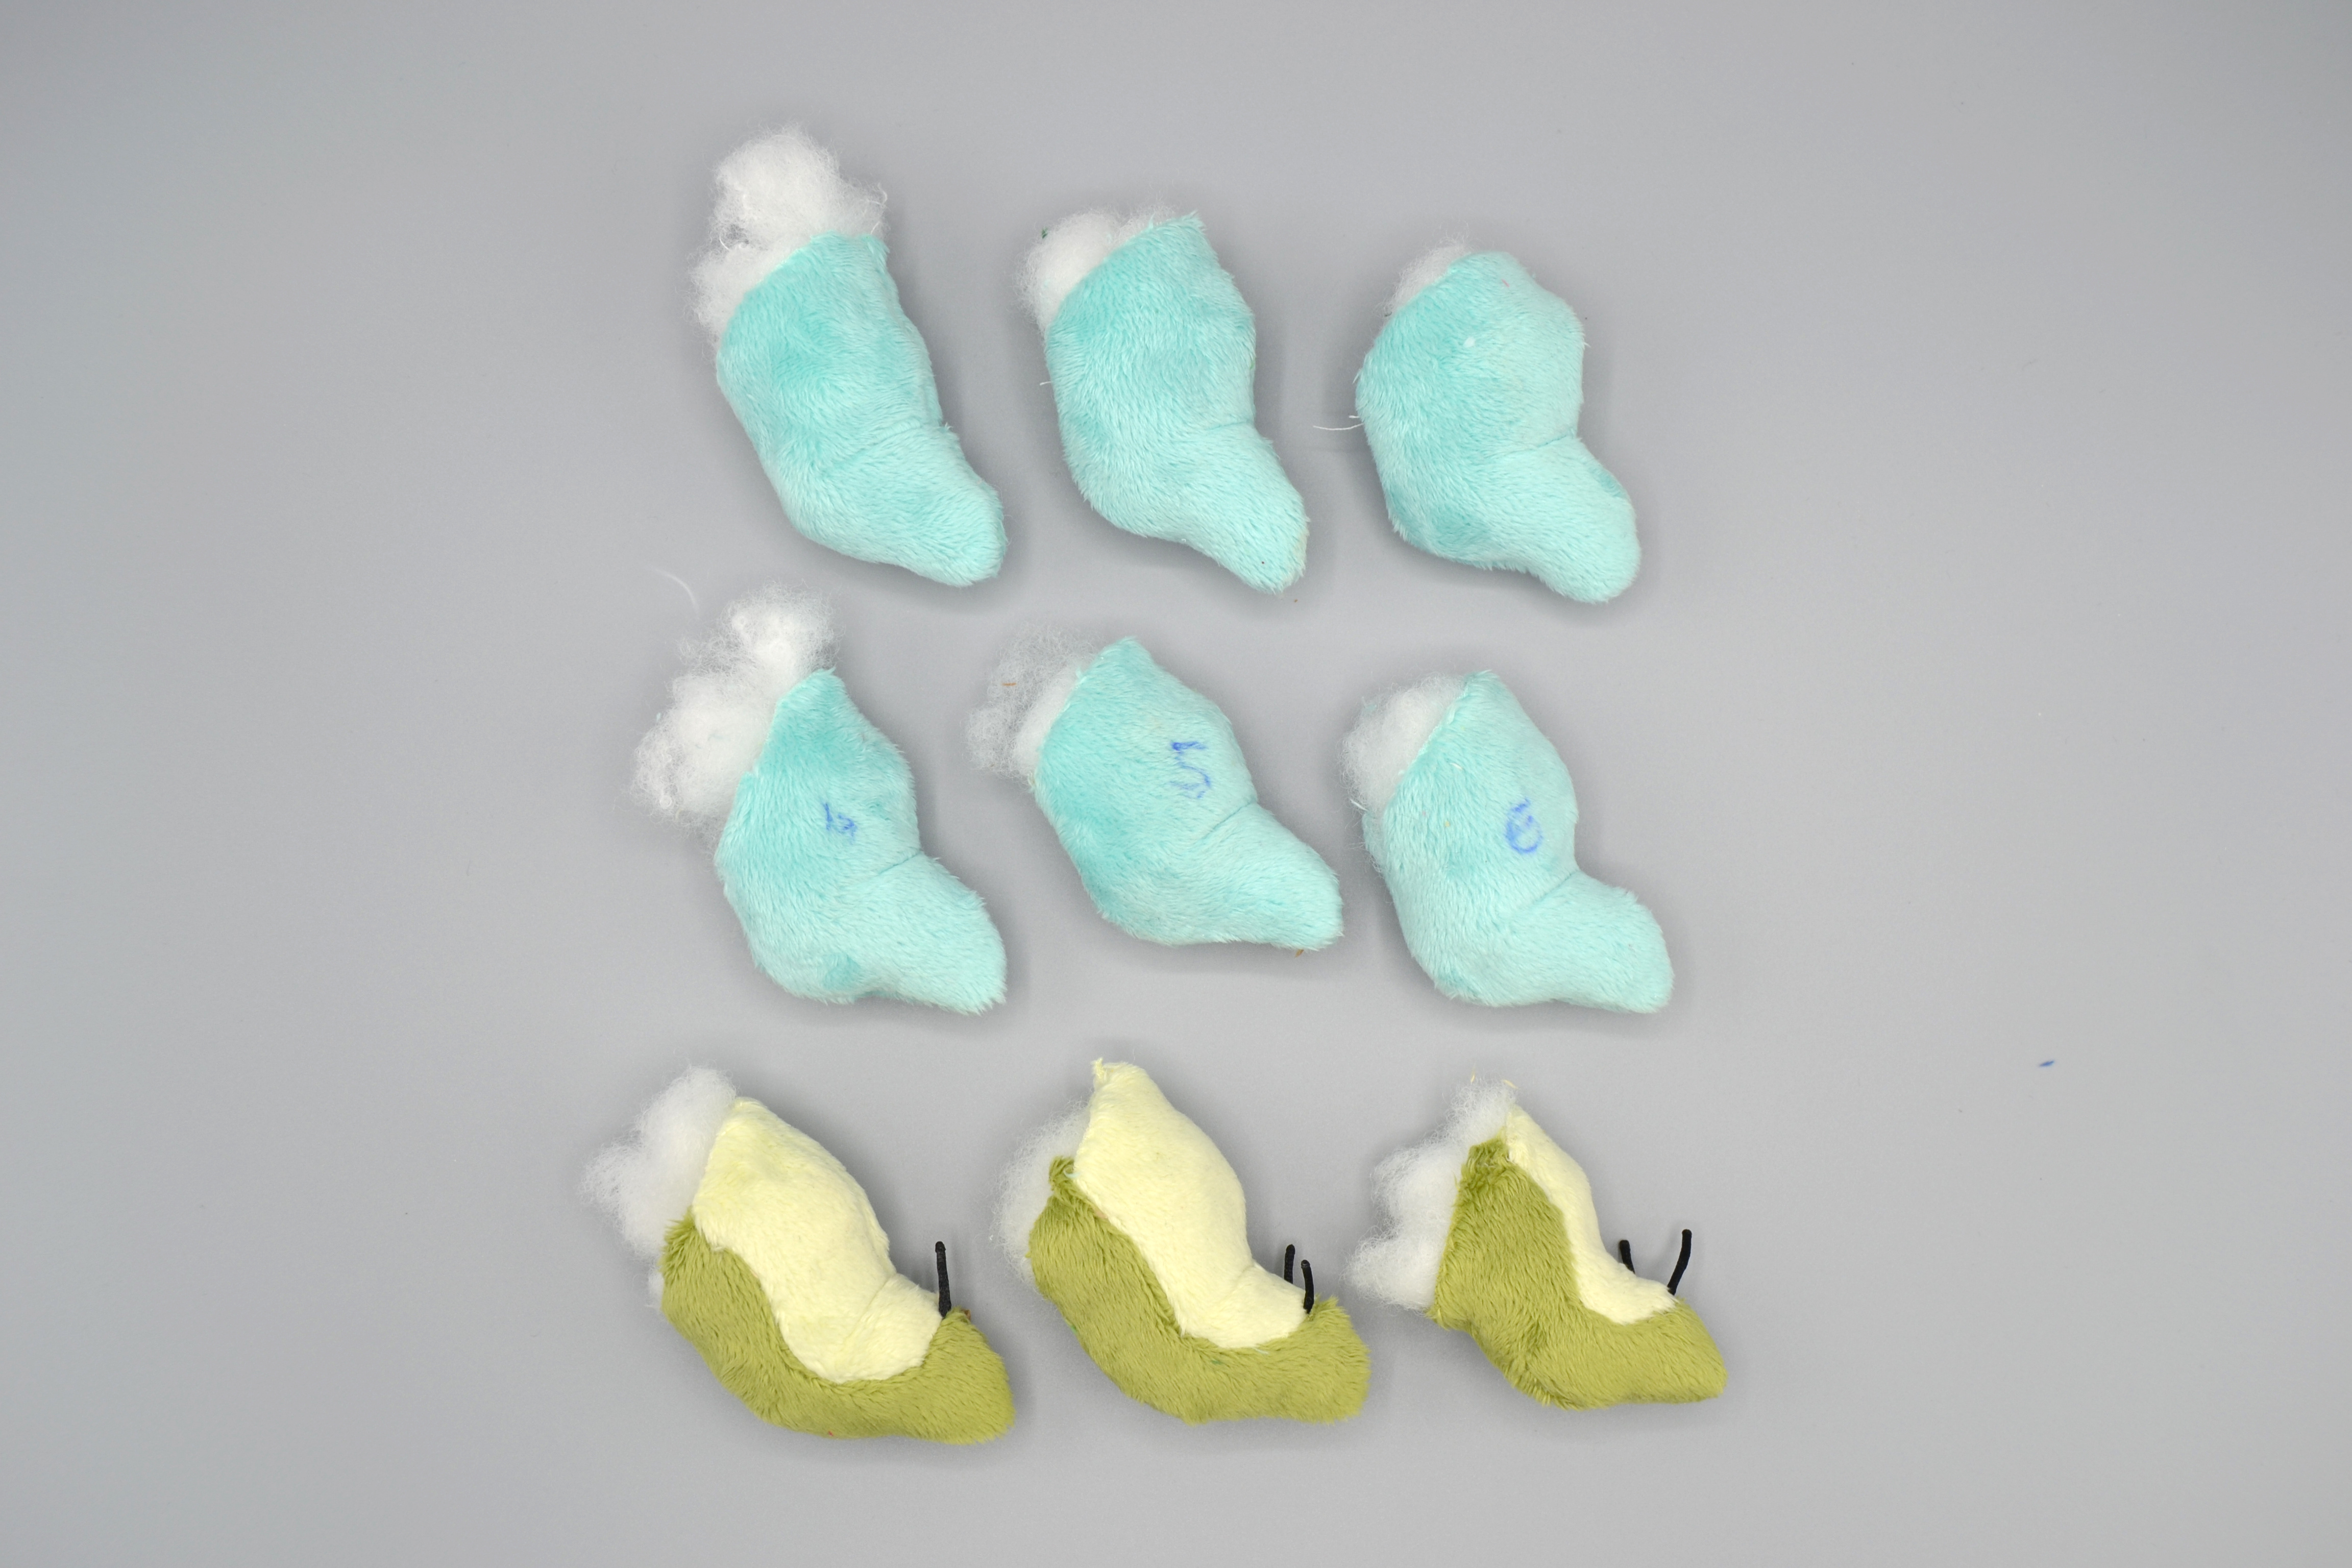
Once the apple was 100% finished, we started working on the worm tail. For this part we also needed a lot of tests, because it had a lot of curves but also different thickness on the tip. It was difficult to make it not look too thick or too flat. The good thing is that it was fast to sew so it wasn't as exhausting as the apple. We made the last pattern changes while working on the colour changes. And we also took the change to try to sew the antennae, which started on said colour change, and they were the reason why we didn't make the tail's colour changes with applique like the apple. But seeing such a cute tail was worth the extra effort.
With all that done, we only had the eyes left. It was a simpel and flat pattern that we got quickly, and we couldn't helpt to try out different expressiones. And they all turned out so adorable.
And this would be all the plush process. We know we maybe make TOO MANY tests. We sometimes think that we should keep some of the previoues tests, because we spend so much time making small and silly changes. But honestly, when we see the plushies finished and how good they look, we feel really proud. And we really like to see the evolution of the shapes when looking at all the prototypes together. Seeing how they change little by little until the final one is really rewarding.
----ESPAÑOL----
Pues hoy os vamos a enseñaros todo el proceso de creación de nuestros adorables Applin! Como no son muchas piezas, os lo enseñaremos todo en un mismo post. Vamos a ello ~
Cuando tuvimos la idea de hacer este Pokémon teníamos algo claro. Queríamos que la parte de manzana pareciera una manzana literal. Que fuera realista en cuanto a sus formas y curvas. También queríamos que tuviera ese pequeño hueco en la zona inferior que suele tener la fruta (y el modelo 3D lo tiene). Así que empezamos a pensar y pensar cómo lo podríamos hacer. Lo primero que hicimos fue diseñar una "esfera" de 6 piezas, ya que el diseño de Applin tiene 6 pinchos en el cambio de color marrón y era la forma más fácil de hacerlo. Después intentamos darle poco a poco la forma de manzana con el patrón, pero no había forma de conseguir las curvas con solo el patronaje.
Y hubo un momento donde a Cris se le ocurrió usar la técnica de esculpir con hilo. No es algo que hayamos usado muchas veces. Alguna vez para los dedos de la patita de un peluche o para la nube del Drifloon grande. Pero sabíamos que otros plush maker lo usaban para hacer otro tipo de detalles y acabar de conseguir formas en sus cabezas. Así que nos pusimos a probar. Como veréis en las fotos, no fue fácil sacar la forma que queríamos jajajaja. Siempre os comentamos que las formas más sencillas son a veces las más difíciles de conseguir, porque al tener pocos detalles, necesita más precisión. También algo que nos hizo necesitar más pruebas es que, como la forma no dependía solo del patrón si no de como esculpíamos la manzana, la manzana adoptaba formas muy distintas. O se alargaba mucho o se achataba demasiado o no hacía bien la forma en "corazón".
Pero después de unos días de prueba y error, sacamos la pieza que buscábamos. Y la verdad es que es de la parte que estamos más orgullosas del peluche :)
Cuando tuvimos la forma sacada, trabajamos en los cambios de color de la manzana. En principio queríamos hacerlos con una costura normal a máquina, pero los dibujos eran demasiado pequeños, así que decidimos hacerlo con un aplique bordado. También era más sencillo de coser con un aplique para los patrons que usasen nuestro patrón ^^ Por suerte, esta parte nos salió bastante rápido!
Después de tener la manzana 100% terminada, nos pusimos a trabajar en la cola de gusano. Para esta pieza también necesitamos bastantes prototipos, porque no solo tenía varias curvas, si no que era más grueso por en medio que en la punta en si. Y era difícil que no se viera muy gorda o muy plana. Lo bueno es que era bastante rápido de coser cada intento, así que no fue tan agotador como el cuerpo. Acabamos de retocar la forma a la vez que hacíamos pruebas de los cambios de color. De paso también aprovechamos para probar cómo coser las antenitas, que salían justo de entre dichos cambios, por lo cual no pudimos hacerlos con aplique como en la manzana. Pero ver la colita sin cuerpo ya era muy adorable.
Ya con todo eso terminado solo tuvimos que coser los ojitos de Applin con un patrón sencillo. Aunque no pudimos evitar probarle diferentes expresiones. Y no nos arrepentimos de ello, porque quedó adorable.
Y hasta aquí sería el proceso del peluche. Sabemos que a lo mejor hacemos DEMASIADAS pruebas. A veces pensamos en que nos deberíamos quedar en alguna de las anteriores que hacemos, porque perdemos mucho tiempo en hacer cambios tontos. Pero sinceramente, cuando vemos el peluche terminado y vemos lo bien que queda, nos sentimos muy orgullosas. Y la verdad, nos gusta mucho ver la evolución de las formas al mirar todos los prototipos juntos. Ver cómo va cambiando poco a poco hasta llegar al resultado final es muy gratificante
Files